[Nuxt Admin] 4. Nuxt에서 컴포넌트 사용

[ Nuxt Admin Template 4 ] Nuxt & Vuetify 기본 템플릿에서 컴포넌트를 이용해서 분할하는 작업
8. Nuxt에서 기본 레이아웃(default.vue)
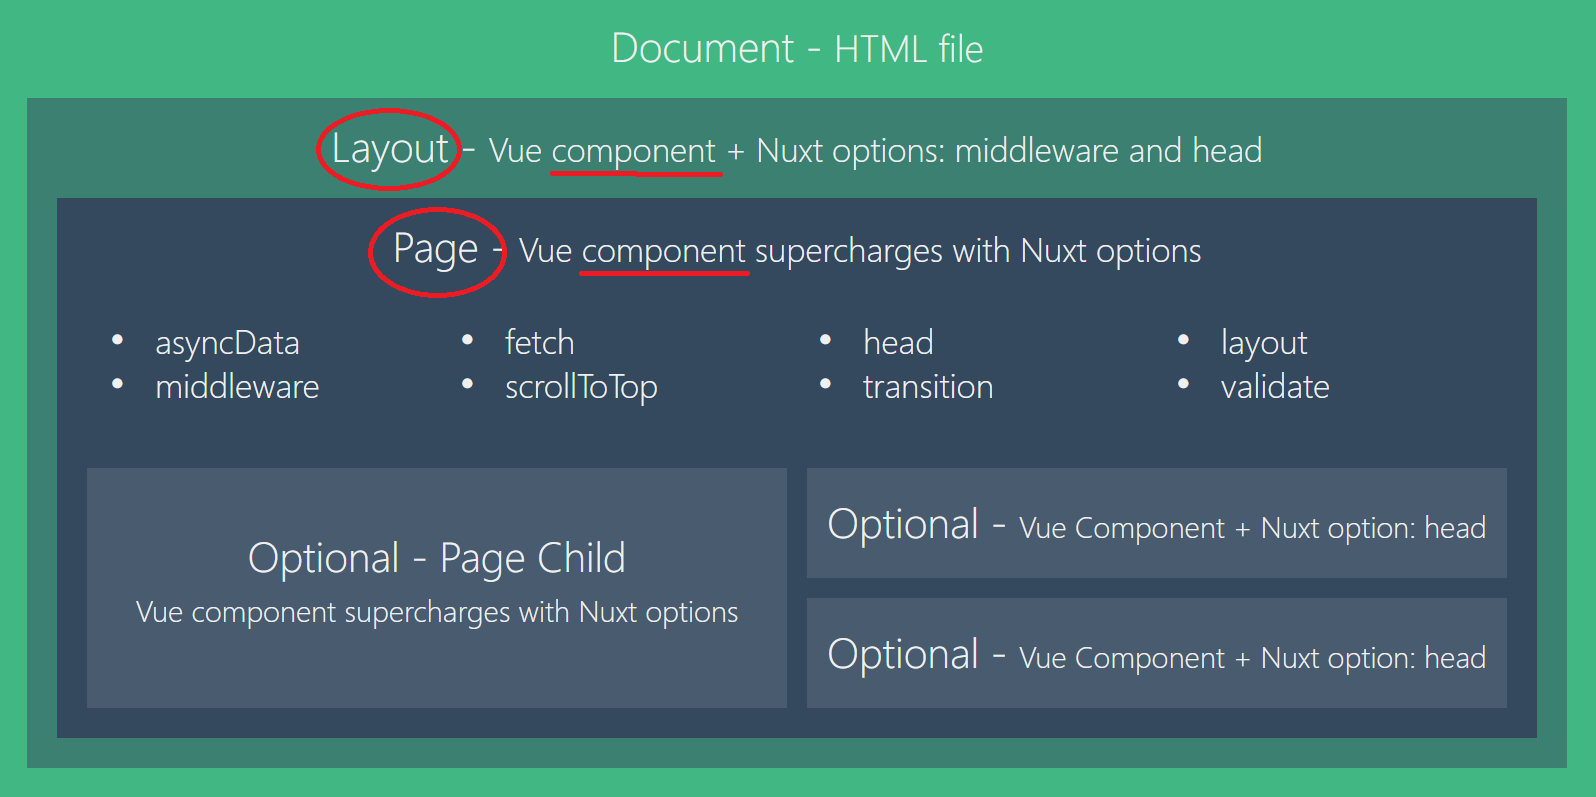
Nuxt는 각 컴포넌트들의 집합체를 디렉토리경로에 따라
- /layouts :
레이아웃 - /pages :
페이지 - /component :
컴포넌트
로 역할이 나눠지며 라우터처리가 되어있고 위의 사진처럼 구조체를 갖고 있다. 해당 https://ko.nuxtjs.org/guide/views/에서 Nuxt Views의 개념을 알 수 있다.
9. Vuetify Layouts 변경
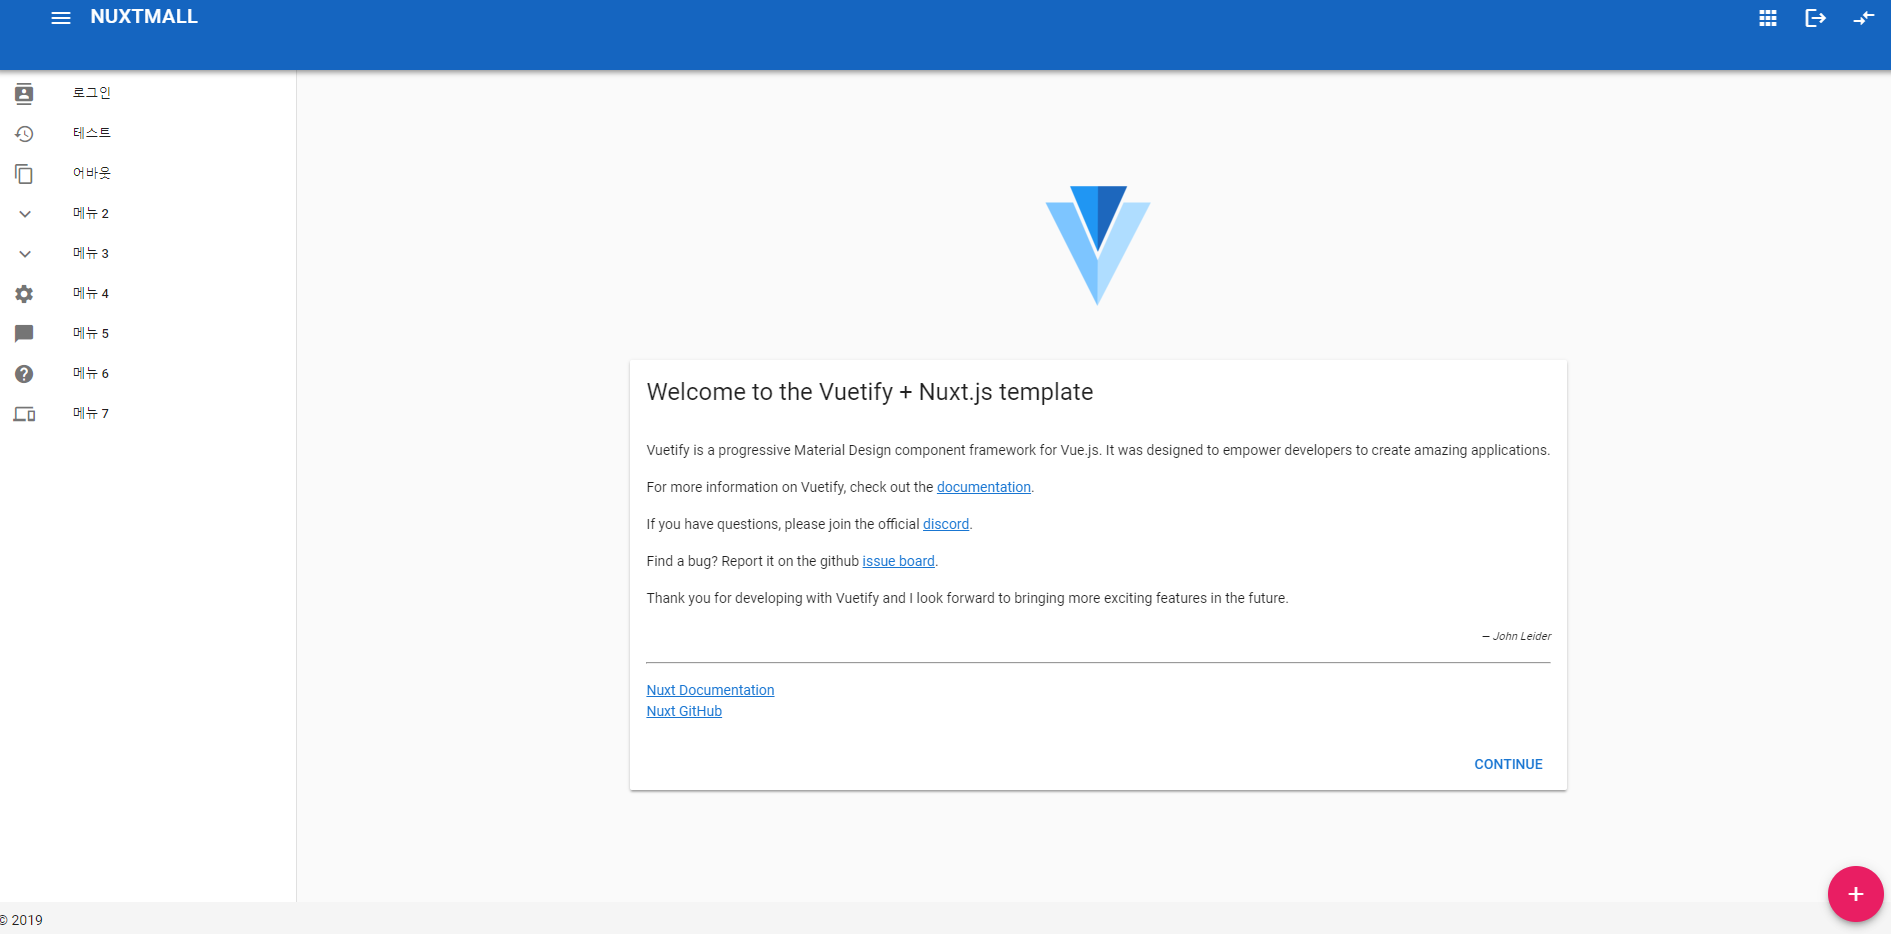
Vuetify에서 지원하는 Layout들 중에 맘에 든 템플릿을 골라서 컴포넌트로 분리하는 작업을 해보자. 우선 본인은 googleContacts 레이아웃 해당 default.vue소스로 설정했다.
layouts/default.vue
//default.vue 소스
//https://github.com/vuetifyjs/vuetify/blob/master/packages/docs/src/examples/layouts/googleContacts.vue
10. default.vue에서 컴포넌트로 분리해서 관리
작업 할 내용
- 기본 레이아웃에서 우측Navi를 가져와서 추가
- 필요없는 부분은 삭제
- LeftNavi, Header, RightNavi, ModalNavi로 컴포넌트로 분할 작업
아래에서 LeftNavi에 대한 부분만 설명하면
components/LeftNavi.vue 생성
<template>
<div>
  <v-navigation-drawer
    :clipped="$vuetify.breakpoint.lgAndUp"
    v-model="drawerChild"
    fixed
    app
  >
    <v-list dense>
      <template v-for="item in items">
        <v-layout
          v-if="item.heading"
          :key="item.heading"
          row
          align-center
        >
          <v-flex xs6>
            <v-subheader v-if="item.heading">
              { { item.heading } }
            </v-subheader>
          </v-flex>
          <v-flex xs6 class="text-xs-center">
            <a href="#!" class="body-2 black--text">EDIT</a>
          </v-flex>
        </v-layout>

        <v-list-group
          v-else-if="item.children"
          v-model="item.model"
          :key="item.text"
          :prepend-icon="item.model ? item.icon : item['icon-alt']"
          append-icon=""
        >
          <!-- 1 depth Group Btn -->
          <v-list-tile slot="activator">
            <v-list-tile-content>
              <v-list-tile-title>
                { { item.text } }
              </v-list-tile-title>
            </v-list-tile-content>
          </v-list-tile>
          <!-- //1 depth Group Btn -->

          <!-- 2 depth Group Btn -->
          <v-list-tile
            v-for="(child, i) in item.children"
            :key="i"
          >
            <v-list-tile-action v-if="child.icon">
              <v-icon>{ { child.icon } }</v-icon>
            </v-list-tile-action>
            <v-list-tile-content>
              <v-list-tile-title>
                { { child.text } }
              </v-list-tile-title>
            </v-list-tile-content>
          </v-list-tile>
          <!-- //2 depth Group Btn -->
        </v-list-group>

        <!-- 1 depth Btn -->
        <v-list-tile v-else :key="item.text" :to="item.to">
          <v-list-tile-action>
            <v-icon>{ { item.icon } }</v-icon>
          </v-list-tile-action>
          <v-list-tile-content>
            <v-list-tile-title>
              { { item.text } }
            </v-list-tile-title>
          </v-list-tile-content>
        </v-list-tile>
        <!-- //1 depth Btn -->

      </template>
    </v-list>
  </v-navigation-drawer>
</div>
</template>

<script>
export default {
  props: ['drawer'],
  data: () => ({
    drawerChild: null,
    items: [
      { icon: 'contacts', text: 'Index', to: '/' },
      { icon: 'history', text: 'Inspire', to: '/Inspire' },
      { icon: 'content_copy', text: '메뉴 1', to: '/about' },
      {
        icon: 'keyboard_arrow_up',
        'icon-alt': 'keyboard_arrow_down',
        text: '메뉴 2',
        model: false,
        children: [
          { icon: 'add', text: '메뉴 2-1' }
        ]
      },
      {
        icon: 'keyboard_arrow_up',
        'icon-alt': 'keyboard_arrow_down',
        text: '메뉴 3',
        model: false,
        children: [
          { text: '메뉴 3-1' },
          { text: '메뉴 3-2' },
          { text: '메뉴 3-3' },
          { text: '메뉴 3-4' },
          { text: '메뉴 3-5' }
        ]
      },
      { icon: 'settings', text: '메뉴 4' },
      { icon: 'chat_bubble', text: '메뉴 5' },
      { icon: 'help', text: '메뉴 6' },
      { icon: 'phonelink', text: '메뉴 7' }
    ]
  }),
  watch: {
    drawer (value) {
      this.drawerChild = value;
    },
    drawerChild (value) {
      this.$emit('isDrawer', value)
    }
  }
}
</script>
layouts/default.vue
<template>
<v-app id="inspire">
<!-- Left Navigation -->
<LeftNavi @isDrawer="isDrawer" :drawer="drawer"></LeftNavi>
<!-- //Left Navigation -->
<!-- Header -->
<Header
@isRightDrawer="isRightDrawer" :rightDrawer="rightDrawer"
@isDrawer="isDrawer" :drawer="drawer"
:appName="appName">
</Header>
<!-- //Header -->
<!-- SPA App Page -->
<v-content>
<v-container fluid fill-height>
<nuxt />
</v-container>
</v-content>
<!-- //SPA App Page -->
<!-- Right Navigation -->
<RightNavi @isRightDrawer="isRightDrawer" :rightDrawer="rightDrawer"></RightNavi>
<!-- //Right Navigation -->
<!-- Dialog Navigation Btn -->
<v-btn
fab
bottom
right
color="pink"
dark
fixed
@click="dialog = !dialog"
>
<v-icon>add</v-icon>
</v-btn>
<!-- //Dialog Navigation Btn -->
<!-- Modal Navigation -->
<ModalNavi @isDialog="isDialog" :dialog="dialog"></ModalNavi>
<!-- //Modal Navigation -->
<!-- Footer -->
<v-footer fixed app>
<span>© { { new Date().getFullYear() } }</span>
</v-footer>
<!-- //Footer -->
</v-app>
</template>
<script>
import Header from '@/components/default/Header.vue'
import LeftNavi from '@/components/default/LeftNavi.vue'
import ModalNavi from '@/components/default/ModalNavi.vue'
import RightNavi from '@/components/default/RightNavi.vue'
export default {
data: () => ({
drawer: false,
rightDrawer: false,
dialog: false,
appName: 'NUXTMALL'
}),
props: {
source: String
},
methods: {
isDrawer (data) {
this.drawer = data;
},
isRightDrawer (data) {
this.rightDrawer = data;
},
isDialog (data) {
this.dialog = data;
}
},
components: {
Header,
LeftNavi,
ModalNavi,
RightNavi
}
}
</script>
상단에 메뉴 버튼 클릭으로 부모컴포넌트(default.vue)의 drawer(data)를 true/false로 제어하기 때문에 부모(default.vue)와 자식(LeftMenu.vue)컴포넌트가 서로 데이터 변화를 감시해야 하기 때문에 watch라는 속성을 사용했다.
- 자식컴포넌트에서 drawer를 props를 선언해서 watch의
drawer호출 - 자식컴포넌트 drawerChild에 true/false 저장
- 다시
drawerChild가 데이터 변화가 감지되면$emit속성으로 부모 이벤트 발생
자세한 설명은 생략합니다.(갑자기 부끄러워서..)
이로써 상태 변화를 감시해서 컴포넌트로 분리 한 후에도 잘 작동됩니다.
참고


