[Vue] 7. TODO-APP REST API 방식 만들기
이전 포스팅에서 진행된 TODO-APP 프로젝트에서 계속작업을 진행하겠습니다.
12. axios 다운로드
이전 포스팅에서는 임의로 data를 세팅한 부분 대신 axios를 이용한 restful방식을 진행하겠습니다.
우선 npm을 이용해서 HTTP 클라이언트 라이브러리 axios를 다운받고 import해서 사용하면 된다.
cmd
npm install --save axios
main.js
axios를 import하고 Vue 인스턴스에 prototype를 이용해 전역선언해서 사용할 수 있다.
// The Vue build version to load with the `import` command
// (runtime-only or standalone) has been set in webpack.base.conf with an alias.
import Vue from 'vue'
import App from './App'
import router from './router'
import axios from 'axios'

Vue.config.productionTip = false
Vue.prototype.$http = axios

/* eslint-disable no-new */
new Vue({
  el: '#app',
  router,
  components: { App },
  template: '<App/>'
})
13. json-server 다운로드
json-server는 REST API를 서버를 사용가능하게 하는 라이브러리다. 간단하게 axios통신을 하기 위해서 npm으로 json-server를 다운로드 받습니다.
cmd
npm i -g json-server
db.json
저는 프로젝트에 동일한 위치에 ‘json-server’ 라는 폴더를 만들고 그안에 db.json이라는 파일을 생성했습니다. json-server를 통해 CRUD를 위해서 기존 데이터와 다르게 수정하도록 하겠습니다.
{
  "todoData": [
    {
      "id": 1,
      "title": "SPA 개념"
    },
    {
      "id": 2,
      "title": "Node.js 알아보기"
    },
    {
      "id": 3,
      "title": "Vue.js 맛보기"
    },
    {
      "id": 4,
      "title": "Vue.js 사용하는 방법"
    }
  ]
}
cmd
my-project/json-server 에 가서 서버를 실행시킨다음
json-server --watch db.json
json-server --watch db.json -port 3001
localhost:3000/todoData으로 url을 접속해보면 임시로 REST API 서버를 확인이 가능합니다.
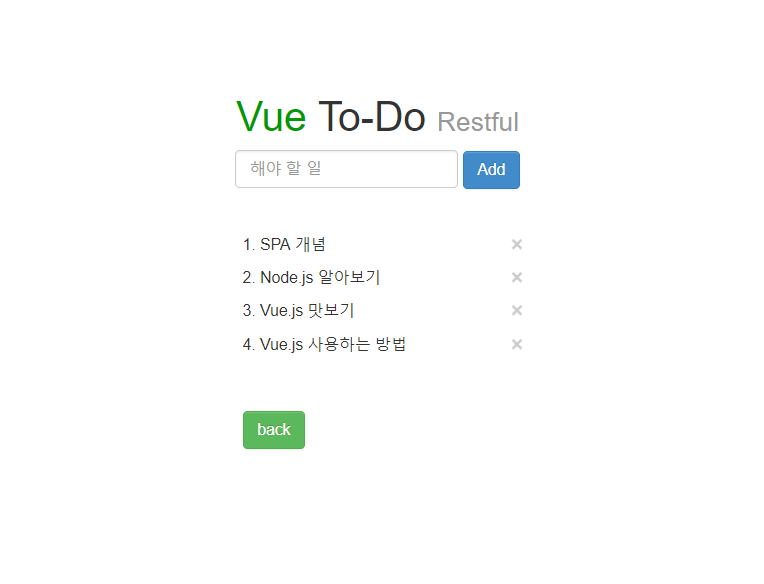
14. todoApp-restful 목록
components/todoApp-restful.vue
14-1. todoApp.vue 를 복사해서 template를 아래와 같이 수정한다.
<template>
  <div class="todoApp">
    <div class="form-group">
      <h1><span class="vue">Vue</span> To-Do
        <small>Restful</small>
      </h1>
      <form role="form">
        <input type="text" class="form-control" placeholder="해야 할 일"
            v-model="title"
		        v-on:keyup.enter="addTodo(title)">
      </form>
      <button type="button" v-on:click="addTodo(title)" class="btn btn btn-primary">Add</button>
    </div>
    <div class="todo-list">
      <!-- todoList 컴포넌트: v-bind(디렉티브) Element 객체의 속성 동적 데이터 바인딩 -->
      <todoList v-bind:todos="todos" v-on:del-todo="delTodo"></todoList>

      <br><br>
      <router-link to="/" tag="button" class="btn btn-success">back</router-link>
    </div>
  </div>
</template>
14-2. method 에 getTodos 추가합니다.
  getTodos () {
    this.$http.get('http://localhost:3000/todoData')
    .then((res) => {
    // .then(function(res){
        console.log('getTodos:', res.data)
        this.todos = res.data
    })
  },
여기서 만약 ES6가 allow function이 아닌 ES5으로 ‘.then(function(res){‘ 로 사용 할 경우 Vue 인스턴스 안에서 부모/자식 관계에서 this를 인식을 못해서 this가 undefined로 나옵니다. (자세한 내용은 저도 잘.. 모릅니다.)
14-3. mounted 훅을 추가합니다.
mounted 훅은 마운팅 직후 호출되며, 이 훅에서는 el을 포함한 모든 컴포넌트에 접근할 수 있다. 그래서 mounted 훅에서 method getTodos를 호출하는 개념이다.
(Vue 생명주기에 대해서는 우선 Skip)
  mounted(){
    this.getTodos()
  },
14-4. todoList.vue 수정
components/todoList.vue
todoApp을 배열로 todoApp-restful은 id값으로 추가/삭제 하기 때문에 onclick 부분을 아래와 같이 수정합니다.
<template>
<div>
<ul v-for="(todo, i) in todos" :key="i" class="list-unstyled">
<li>
{ {i+1} }. { {todo.title} }
<span v-if="todo.id != null" v-on:click="delTodo(todo.id)" class="close" aria-hidden="true">×</span>
<span v-else v-on:click="delTodo(i)" class="close" aria-hidden="true">×</span>
</li>
</ul>
</div>
</template>
이제 하드코딩 된 data를 삭제하고, 다시 http://localhost:8080/todoRestful 접속하면 된다.
  data(){
    return {
      title: '',
      todos:[]
    }
  },
15. todoApp-restful 등록
  addTodo (title){
    if(title){
      this.$http.post('http://localhost:3000/todoData', {
        title:title
      }).then((res) => {
        this.todos.push(res.data);
        this.title = ''
      })
    }
  },
16. todoApp-restful 삭제
  delTodo (todo){
    this.$http.delete('http://localhost:3000/todoData/'+todo)
    .then((res) => {
      this.getTodos()
    })
  }
실제로 등록과 삭제를 하면 json-server 내 db.json도 같이 바뀌는 것을 확인 할 수 있다.

이렇게 vue.js를 위용한 간단한 TODO-APP 토이프로젝트는 갑자기 만들어져서 갑자기 종료되었다.
아래는 변경 된 소스이다.
소스
todoApp-restful.vue 전체 script
// todoList 컴포넌트 import
import todoList from '@/components/todoList'
export default {
  name: 'todoApp-restful',
  // data
  data(){
    return {
      title: '',
      todos:[]
    }
  },
  methods:{
    getTodos () {
      this.$http.get('http://localhost:3000/todoData')
      .then((res) => {
        this.todos = res.data
      })
    },
		addTodo (title){
      if(title){
        this.$http.post('http://localhost:3000/todoData', {
			    title:title
		    }).then((res) => {
				  this.todos.push(res.data);
          this.title = ''
		    })
      }
		},
    delTodo (todo){
      this.$http.delete('http://localhost:3000/todoData/'+todo)
			.then((res) => {
					this.getTodos()
			})
    }
	},
  mounted(){
    this.getTodos()
  },
  components: {
    'todoList': todoList
  }
}
components/todoApp.vue
<template>
  <div class="todoApp">
    <div class="form-group">
      <h1><span class="vue">Vue</span> To-Do
        <small>List</small>
      </h1>
      <form role="form">
        <input type="text" class="form-control" placeholder="해야 할 일"
            v-model="title"
		        v-on:keyup.enter="addTodo(title)">
      </form>
      <button type="button" v-on:click="addTodo(title)" class="btn btn btn-primary">Add</button>
    </div>
    <div class="todo-list">
      <!-- todoList 컴포넌트: v-bind(디렉티브) Element 객체의 속성 동적 데이터 바인딩 -->
      <todoList v-bind:todos="todos" v-on:del-todo="delTodo"></todoList>

      <br><br>
      <router-link to="/todoRestful" tag="button" class="btn btn-success">Restful</router-link>
    </div>
  </div>
</template>
처음 접한 사람들은 가볍게라도 아래의 내용을 접했다. 그리고 그 Keyword로 다른 고수분들의 블로그로 공부하기에 편할 수 있다.
- SPA
- vue.js
- vue-cli
- node.js
- npm
- REST API 방식(axios, json-server 라이브러리 사용)
- 부모/자식 컴포넌트 구현
- todoList 컴포넌트 재사용
- TODO-LIST 개발
하여튼 이렇게 vue.js로 REST API 형태로 TODO-APP 포스팅은 완료되었고
번외로 테이블, 그리드, 페이징 처리 등 Vue 모듈로 사용하는 방법을 다음 포스팅에서 진행하겠습니다. ㅂㅂ2
참고